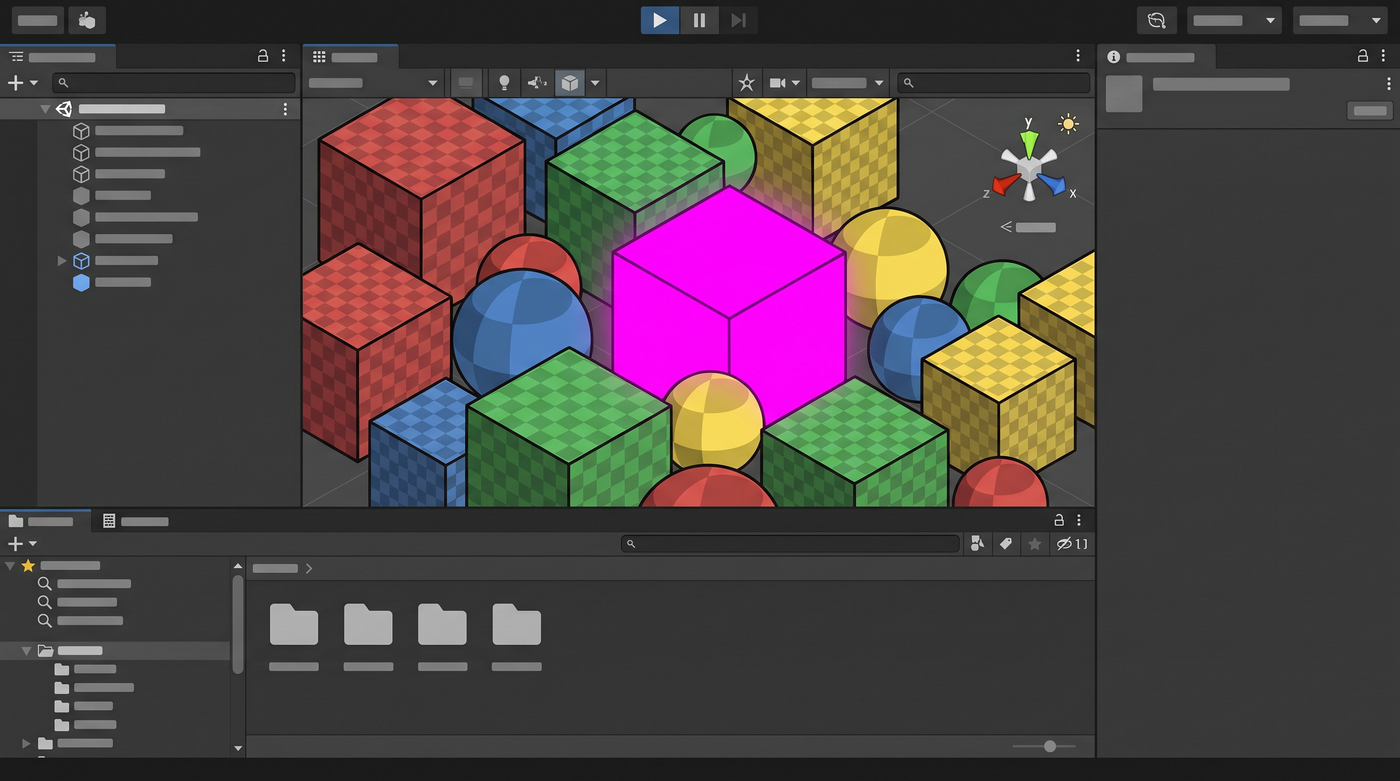
Unity as an art tool
Unity ships with a surprising amount of visual building blocks right out of the box. Most developers treat them as debug-only utilities, but with a little care they can form the basis of a real art style.
The key insight is that "default Unity look" is recognizable — which means you can lean into it as a deliberate aesthetic rather than apologizing for it as placeholder art.
If everything in your game is made from Unity primitives with default materials, it doesn't look like you forgot the art. It looks like a style choice. The problem is inconsistency, not simplicity.
Core building blocks
Unity comes with these primitives by default, and every one of them can be part of your visual vocabulary:
- Cube — the workhorse. Use for walls, platforms, boxes, buildings, furniture, and pretty much anything rectilinear.
- Sphere — for characters, projectiles, orbs, planets, and anything round.
- Capsule — the classic player stand-in. Also good for trees, columns, and cylindrical objects.
- Cylinder — pipes, barrels, pillars, wheels.
- Plane — ground, floors, ceilings, flat surfaces.
- Quad — sprites, billboards, UI elements in 3D space.
Combine these simple primitives to build more complex objects. A tree is a cylinder plus a sphere. A house is a cube with a smaller rotated cube on top. A car is a box on four cylinders. This technique — sometimes called "primitive assembly" — is the 3D equivalent of drawing with basic shapes.
Material and color system
The fastest way to make default primitives look intentional is to set up a consistent color and material system. Don't use the default grey material on everything. Create a palette of 5-8 colors and assign each one to a specific purpose.
Recommended color assignments
| Category | Color | Use for |
|---|---|---|
| Player | Bright cyan / blue | Player character, player-controlled objects |
| Enemies | Red / magenta | Hostile entities, hazards, danger |
| Interactive | Yellow / gold | Collectibles, pickups, usable objects |
| Environment | Dark grey / green | Floors, walls, static scenery |
| UI / markers | White | Waypoints, indicators, debug info |
| Background | Dark blue / black | Skybox, far background elements |
Create a material for each color and reuse them across every object in your scene. Use URP's standard lit or unlit shaders — unlit is actually better for a clean programmer-art look because it eliminates the complexity of lighting and just shows pure color.
Lighting and atmosphere
Good lighting does more to sell your visual style than any model detail. Even with default cubes, thoughtful lighting can make your game look deliberately designed rather than thrown together.
- Pick a direction. One directional light as your key light, angled to give interesting shadows. Avoid flat top-down lighting — it makes everything look flat and boring.
- Use fog. Distance fog hides the edges of your world and adds atmosphere. It's a single setting change with massive visual impact.
- Add a skybox. A gradient skybox takes 30 seconds to set up and instantly makes the world feel like a real place instead of a grey void.
- Post-processing stack. Bloom, vignette, and color grading can transform the look of even the simplest scene. Start with subtle settings and build up.
Gizmos and debug drawing as art
Unity's Gizmos and Debug.Draw* systems are usually for debugging, but there's no rule that says you can't use them for actual game visuals. Wireframes, outlines, icons — these all work in-game with the right setup.
Draw bounding boxes around important objects. Show trajectory lines for projectiles. Draw icons above enemies. All of these are programmer-friendly to implement and they reinforce the "technical" aesthetic of a primitive-based art style.
// Example: Draw a wireframe cube around every enemy
void OnDrawGizmos()
{
    Gizmos.color = Color.red;
    Gizmos.DrawWireCube(transform.position, Vector3.one * 1.5f);
}
Shader Graph tricks
Unity's Shader Graph is one of the most underutilized tools for programmer-art workflows. You don't need to write complex shaders — even simple ones can dramatically improve your game's look.
- Outline shader. An inverted-hull outline shader makes every object pop and gives your game a defined style. There are dozens of free tutorials and asset store options.
- Color ramp / toon shading. Replace realistic lighting with stepped colors for a stylized look. Great for hiding the fact that your models are simple primitives.
- Simple vertex animation. Make trees sway, grass wave, or objects pulse — all in the shader, no animation clips needed.
- Scrolling textures. Procedural textures that scroll or animate can give even a flat plane visual interest.
UI and HUD
Unity's UI system is powerful enough that you don't need any art assets to make a good-looking interface. With the built-in controls and a little care, you can create a clean, functional UI.
- Use the default Image component with solid colors for panels and buttons
- Pick 2-3 font weights and sizes for all text — don't mix too many styles
- Use layout groups to keep things aligned and consistent
- Add subtle borders or outlines using 9-slice images (or just thin rectangular images)
- Use the TextMeshPro default fonts — they're clean and legible
For some things, buying an asset is cheaper than building it yourself. Outline shaders, post-processing effects, and UI framework assets are usually good value. Avoid buying art packs — they'll break your style consistency unless you commit to a full art overhaul.
Particle systems and VFX
Unity's built-in particle system is genuinely excellent, and it's a programmer's best friend for making a game feel polished without art skills. Simple particle effects can sell the feel of actions and cover for simple models.
- Impact effects. A burst of particles when something hits makes every collision feel more substantial.
- Trails. Add trails to projectiles, the player, or anything that moves fast. Trails read really well.
- Ambient particles. Floating dust, falling leaves, rain — simple environmental particles add atmosphere with zero modeling.
- Shield / aura effects. A simple particle ring around an object can make it feel important or powerful.
Procedural generation with code
This is where being a programmer gives you a real edge. Instead of manually placing and designing every object, write code to generate variation for you.
- Procedural level generation. Generate rooms, corridors, or terrain in code using simple primitives. It will look consistent because it's all made from the same building blocks.
- Random color variation. Slightly randomize the color of each object for a more organic feel without hand-painting anything.
- Animation via code. Use sine waves, noise functions, or physics to add motion to static objects.
- Mesh generation. For advanced users — generate simple meshes procedurally instead of modeling them in an external tool.
Putting it all together: a checklist
-
1
Pick a color palette
5-8 colors, each with a defined purpose. Create materials for each one.
-
2
Build objects from primitives
Use only default cubes, spheres, and cylinders for everything in your scene.
-
3
Set up lighting
One directional light, fog, a gradient skybox, and subtle post-processing.
-
4
Add an outline or toon shader
One shader change that makes every object in the game look more intentional.
-
5
Add particles and motion
Trails, impacts, and ambient particles to add life to the scene.
-
6
Polish the UI
Clean, consistent interface using only built-in UI elements.
FAQ
Can I ship a commercial game with this approach?
Should I use URP or the Built-in Render Pipeline?
How do I handle character animation with primitives?
Check out the 3D Placeholder Art guide for more primitive assembly techniques, or the Art Techniques guide for general principles that apply to any engine.